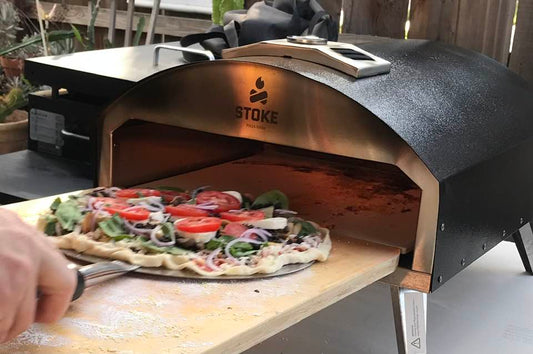
When I first started making pizzas from scratch, one of the most critical and often frustrating challenges I encountered was figuring out how to know when pizza dough is ready. My lack of experience would almost always lead me to over-knead the dough. Thankfully, I eventually found fool-proof ways to test the readiness of the dough.
The quickest and easiest way to pinpoint the exact moment when pizza dough is perfectly ready is with a poke test. Gently press your finger into the dough. If the indentation vanishes very slowly, your dough is ready! Also, keep in mind that a well-prepared dough would be smooth, elastic, and slightly tacky to the touch.
Looking for more insider techniques and straightforward tips to determine precisely when your pizza dough is ready to hit the oven? Let’s get to it right away!
| Test | Description | Ready | Needs More Time |
|---|---|---|---|
| Poke test | Gently press the dough with your finger. | Springs back immediately | Springs back slowly and leaves a slight indentation |
| Windowpane test | Stretch a small piece of dough between your fingers. | The volume of dough has doubled | Tears or breaks when stretched |
| Doubling test | The dough should have doubled in size during proofing. | The volume of dough has increased, but not doubled | The volume of dough has increased but not doubled |
The Pizza Dough Detective: Unraveling Visual and Textural Clues
1. During the Alchemy of Mixing and Kneading
No prizes for guessing that it’s all about how you mix and knead the dough. This is the most crucial step of the entire process.
Nail this part, and you’re golden (unless you fail to proof the dough properly, of course). Here are some key characteristics to watch out for when mixing and kneading the dough:
Spotting the Perfect Detachment: Dough and Bowl Dynamics
As you mix and knead your dough, a clear sign that it’s on the right track is when it begins to pull away from the sides of the mixing bowl.
This indicates that the ingredients are properly combined. That said, you don’t want the mass to be completely detached from the sides, either. A slight connection is a good sign that the dough has achieved the right consistency.
The Ideal Tackiness: Sticky, but Not Too Sticky
Finding that sweet spot between tacky and overly sticky is crucial. When you touch the dough, it should feel slightly tacky to the touch but not stick to your fingers.
This tackiness implies that the dough has absorbed the right amount of moisture. Now you know that it’s ready for further kneading. If it’s too sticky, you may need to add a bit more flour. And if it’s too dry, adding a touch of water can help.
Elasticity Unleashed: Time for the Windowpane Test
A hallmark of well-prepared pizza dough is its elasticity. To test this, take a small piece of dough and gently stretch it between your fingers.
If it can stretch thin without tearing, forming a translucent membrane, you’re on the right track. This little hack is also known as the windowpane test.
2. Observations in the First Rise (Bulk Fermentation)

The first rise is where the magic truly happens in any yeasted dough preparation. It’s a period of transformation, and getting it right can make all the difference in the world. Here’s what to look for at this stage:
Doubling Down: When Your Dough Grows?
The most significant transformation during the first rise is the dough’s size. Your dough should roughly double in volume during this time. This happens as the yeast consumes sugars, producing carbon dioxide gas that gets trapped in the dough, causing it to expand.
It’s a visual indicator that fermentation is progressing as it should. However, you need to be patient with it as every dough rises at its own pace.
I’ve found that a longer, slower first rise always leads to better dough development. If you have the time, allow your dough to ferment in the refrigerator for 24 hours. This will lead to a more pronounced taste profile. 48 hours is even better; 72 hours would be perfect!
Acing the Poke Test: The Dough’s Resilient Response
To check if your dough is ready for the next step, gently press your finger into the dough. It should leave an imprint that doesn’t spring back entirely. This test is also known as the “poke test’. It tells you that the dough has developed sufficient gluten structure.
The slight indentation is your cue that it’s time to move forward with shaping and dressing the dough. If the dough bounces back immediately, give it some more time to proof.
Bubbles of Perfection: The Telltale Signs on the Dough’s Surface
During the first rise, you should also be able to notice the formation of small bubbles or air pockets on the dough’s surface. This is a clear sign that fermentation is at work, creating pockets of gas within the dough.

However, if the bubbles are too large, that’s going to be a problem while baking. So, if the bubbles are too large and widespread, feel free to pop them while stretching the dough. Or, simply use a dough docker or fork to dock your dough.
3. The Art of Shaping: Final Checks Before Baking
When you’re shaping your pizza dough, it’s the moment when you can truly see and feel its readiness. Here’s what to look for:
Stretching Success: Finding the Balance Without Tearing
This is another sign that your pizza dough is ready for shaping. When you gently pull and shape the dough with your hands or a rolling pin, it should stretch smoothly and evenly.
If it’s tearing easily, it may not have developed enough gluten structure during the previous steps. In this case, you can let it rest for a few more minutes and then try again.
Shape Retention: When Dough Doesn’t Shrink Back
As you shape the dough into your desired pizza size, it should hold its shape well. This means it won’t immediately shrink back or retract like a spring when you stretch it.
A dough that retains its shape indicates that the gluten has relaxed sufficiently. Such doughs are easier to work with. It’s a delicate balance – if it shrinks back too much, it may need more time to rest and relax.
Feeling the Lightness: The Airy Touch Test
When you touch the dough during shaping, it should feel airy and light. This is a result of the trapped gases from the fermentation process. It creates a delicate, porous structure within the dough.
The sensation of lightness suggests that the dough has reached its full potential in terms of texture and flavor.
Additional Insights: The Float Test and Beyond
The float test is a common method used to assess the readiness of yeast-based dough. It involves gently placing a small piece of dough into a bowl of water and observing whether it floats or sinks. If the dough floats, it indicates that enough gas has been produced during fermentation. Take it as a sign of readiness.
It’s a handy method, especially when you want to check multiple batches of dough simultaneously. You can simply drop a small piece of dough from each batch into water to compare their readiness.
While the float test can be a helpful tool for a quick check of your pizza dough’s fermentation progress, it should not be the sole method you rely on. However, sometimes, dough that isn’t fully fermented can float due to trapped air bubbles.
This can give you a false positive result, suggesting the dough is ready when it still needs more time to develop.
Instead, consider it as one of several indicators, alongside other factors like dough volume increase, appearance, and feel.
The Variables of Dough Readiness: Understanding the Impact of
Now, this is the part where things can get really tricky…
1. Ambient Temperature: The Invisible Hand
Warmer environments accelerate the fermentation, causing the dough to rise and develop faster. Cooler temperatures slow down the process. You need to adjust their dough preparation timelines based on the room temperature to ensure consistent results.
2. Humidity: The Dough’s Silent Partner
Humidity levels in your kitchen can impact dough hydration and fermentation as well. Higher humidity can make the dough stickier, affecting its texture and ease of handling. Conversely, low humidity may require adjustments to prevent dough from drying out during the rising process.
3. Key Ingredients: The Role They Play
The type and quality of ingredients used can influence dough readiness. High-protein flours like 00 flour can develop gluten more efficiently. The precise measurements of flour, water, salt, and yeast also play a crucial role in determining readiness.
4. Yeast Aging: The Clock Ticks
The freshness and activity of the yeast you use are critical. Fresh yeast or active dry yeast that’s well within its expiration date will ferment more effectively than expired or weak yeast. The type of yeast strain, whether instant, active, dry, or fresh, can also impact fermentation speed.
Conclusion: Wrapping Up the Pizza Dough Mystery
I hope this article helped you finally figure out how to know when pizza dough is ready. The good thing is, as you gain experience, you’ll develop an intuitive sense of how these elements affect your dough. This would allow you to create consistently excellent pizza crusts regardless of the variables at play.
So, don’t sweat it. Don’t be disheartened if your first few batches are a complete disaster. Try to closely follow all the tips and indicators laid out above. And eventually, your pizza will turn out exactly how you’ve always imagined!