Howdy? Today, I plan on spilling the beans on how to use a wood-fired pizza oven like a boss, covering everything from fire prep to temperature control. If you want to take your pizza game up a notch, keep reading. No clichés or boring advice here – just pure, smoky pizza wisdom.
Before you go full-throttle into the wood-fired oven game, here’s the lowdown: pick dry hardwood for your fire, take your time getting that oven hot, and remember to spin that pizza for even cooking. Stick to these basics when using a wood-fired pizza oven for the first time.
Apart from the basics, I’m also gonna dish out additional tips and tricks that’ll have you slinging artisanal pies like you’ve been doing it all your life. So, without any further ado, let’s get to the point:
So, How Does a Wood-fired Pizza Oven Work, Actually?
Alright, let’s break down how a wood-fired pizza oven works. The main principle of a wood-fired oven is pretty straightforward:
1. Heating the Oven
The energy source heats the inside of the oven, which is designed to keep the heat and spread it evenly. This makes sure that all pizzas cooked in the oven are done at the same time and cooked evenly. The oven’s shape and materials keep the temperature even after the flame goes out.
2. Controlling the Temperature
You can adjust the oven’s temperature by adding more wood and partially closing the chimney damper. To control the temperature, use the chimney damper. If you leave it open, the inside temperature will go down, and if you mostly close it, the temperature will go up.
3. Retained Heat Cooking
Retained heat cooking relies on the heat trapped in your oven’s dome and floor to bake and roast at lower, more traditional temperatures. To use this method in a wood-fired oven, start by heating the oven to its maximum temperature (750°F or higher), which should take around an hour or less. Then, allow the fire to burn out and remove the coals.
Close the door of your brick oven to keep the heat inside, and let your pizza oven stabilize and regulate its temperature. Building up a solid base of heat is essential for longer cooking times. The more heat you initially put in, the longer you can maintain the desired cooking temperature.
Wood-fired Pizza Oven 101: How to Get Started?
If you’re using a wood-fired pizza oven for the first time, let’s kick things off with how to get started without a hitch. No fuss, just the facts.
Safety Precautions
Safety first, folks. Here’s what you need to know:
- Proper Placement: Your oven should sit at least 10 feet away from any structures or flammable stuff like trees, washing lines, or buildings. Safety zone, remember that.
- Dress Right: Wear loose, natural-fiber clothing that covers your arms and legs. Synthetic fabrics? Nope, they can melt or catch fire when they meet the heat.
- Hair Control: Got long locks? Tie ’em back – we don’t want any fiery hairdos.
Preparing the Oven
Now, let’s prep that oven:
Curing the Oven: Curing your wood-fired pizza oven before first use is essential for its longevity and performance. This process involves systematically and gently removing any residual moisture that might be present in the oven after construction.

Ideally, over about 5 days, you’ll gradually increase the temperature inside the oven.
Wood Choice: Use dry, seasoned wood. No resinous, wet, or treated wood, please. If your oven’s damp, let it dry out before cooking. Make sure to use clean and dry wood only for a consistent, excess smoke-free burn.
Light It Up: Follow the manufacturer’s instructions to light your oven. I like to begin with small bits of kindling to get a blaze going, then move on to medium-sized logs. Dry hardwoods like ash, birch, or oak work best, and some folks swear by the Mediterranean aroma of olive wood as well.
Setting the Temperature
Temperature control is key for the ultimate pizza:
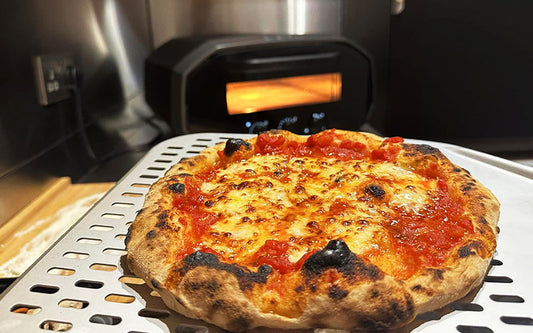
Ideal Temp: Aim for a floor temperature around 750°F-850F. That gives you a 60 to 90-second cooking time.
Heat It Up: Let the oven warm up until the stone hits 700°F to 1,000°F (use an infrared thermometer). The wait time varies (15 to 30 minutes) based on your oven model and fuel type.
Control the Heat: Adjust the temperature by adding more wood and tweaking the chimney damper. Open damper cools it down, closed damper cranks it up.
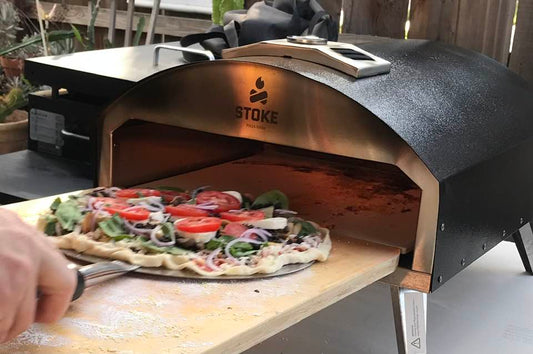
Cooking the Pizza

Cooking’s where the magic happens:
Turn and Burn: Cook your pizza, flipping it every 10 to 20 seconds. Wait for an even browned bottom and charred spots on top and around the edges.
Heat Strategy: Heat it up full blast for about an hour, let the fire die, rake out coals, and close the door to let it settle.
Retained Heat: For longer baking or roasting, build up heat. More in means more out. Simple, right?
Cleaning the Oven
Lastly, a clean exit:
Cool Down: Clean when it’s cooled down – hot cleaning’s a no-go.
Temperature Watch: Keep an eye on the temperature while cleaning.
Don’t Leave It Alone: Stay with it during cleaning – no wandering off, please.
Outdoor Use Only: Use it outdoors, not for home heating.
That’s it. That was your crash course in wood-fired pizza oven mastery.
Wood-fired Pizza Oven Related FAQ
Why does pizza from a wood-fired oven taste different?
Wood-fired ovens impart a unique taste due to high heat, creating a crisp crust and smoky flavor. The quick cooking time locks in freshness and creates that signature wood-fired magic.
What type of wood should I use?
Optimal wood for a wood-fired pizza oven includes seasoned and dry hardwoods like oak, maple, ash, and hickory. These dense woods burn longer, ensuring the necessary high temperatures. Avoid softwoods like pine and spruce; they produce excessive smoke, negatively impacting pizza flavor.
Do I need to cure my pizza oven before the first use?
Yes, curing your wood-fired pizza oven is a must. It dries out any leftover moisture from building and assembly. Slowly ramp up the heat over 5 days so you won’t harm the oven later. It’s like a warm-up before the main event.
How do I know when the oven is at the right temperature?
The most accurate way to measure an oven’s temperature is with an oven thermometer. Put the thermometer in the middle of the oven rack, where your food cooks, not on a wall or near the edges of the rack, where the reading might not be as precise.
How long does it take to cook a pizza in a wood-fired oven?
Typically, a wood-fired oven’s sweet spot falls around 400 to 450°C or 700°F, perfect for a pizza cooked in 60-90 seconds. Yet, certain ovens can crank it up to a scorching 1,000 degrees, firing out pizzas in under a minute.
Is there any special dough recipe for wood-fired pizzas?
Not really. The dough recipe isn’t usually determined by the kind of oven you’re using but by the type of crust, you’re looking for.
Do I need a permit to install a wood-fired pizza oven?
The need for a permit for installing a wood-fired pizza oven varies based on location, oven type, and local rules. First, consult local zoning authorities to determine if a permit is required. Generally, residential backyard ovens may not need permits, while commercial setups often do.
The Bottom Line
Alright, looks like we’ve reached the end of our wood-fired pizza oven crash course for beginners. Using a wood-fired oven for the first time is indeed going to feel daunting. Mishaps may occur and you may end up burning a pizza or two. Don’t let that dampen your spirit.
It takes time and practice to master the art of baking using a wood-fired oven. Hang in there, and if you ever feel stuck with your oven at any point, feel free to reach out to me!